Set up wordpress website with your own domain name and hosting
1. Part: Uploading Unzipped WordPress folder to our Namecheap server
Log in to your Namecheap account: Go to the Namecheap website and sign in using your credentials.
Access the cPanel dashboard: Once logged in, locate the cPanel icon or link. Click on it to enter the cPanel dashboard.
Locate File Manager: In the cPanel dashboard, search for the "File Manager" icon or link. It is usually located in the "Files" or "File Management" section. Click on it to open the File Manager.

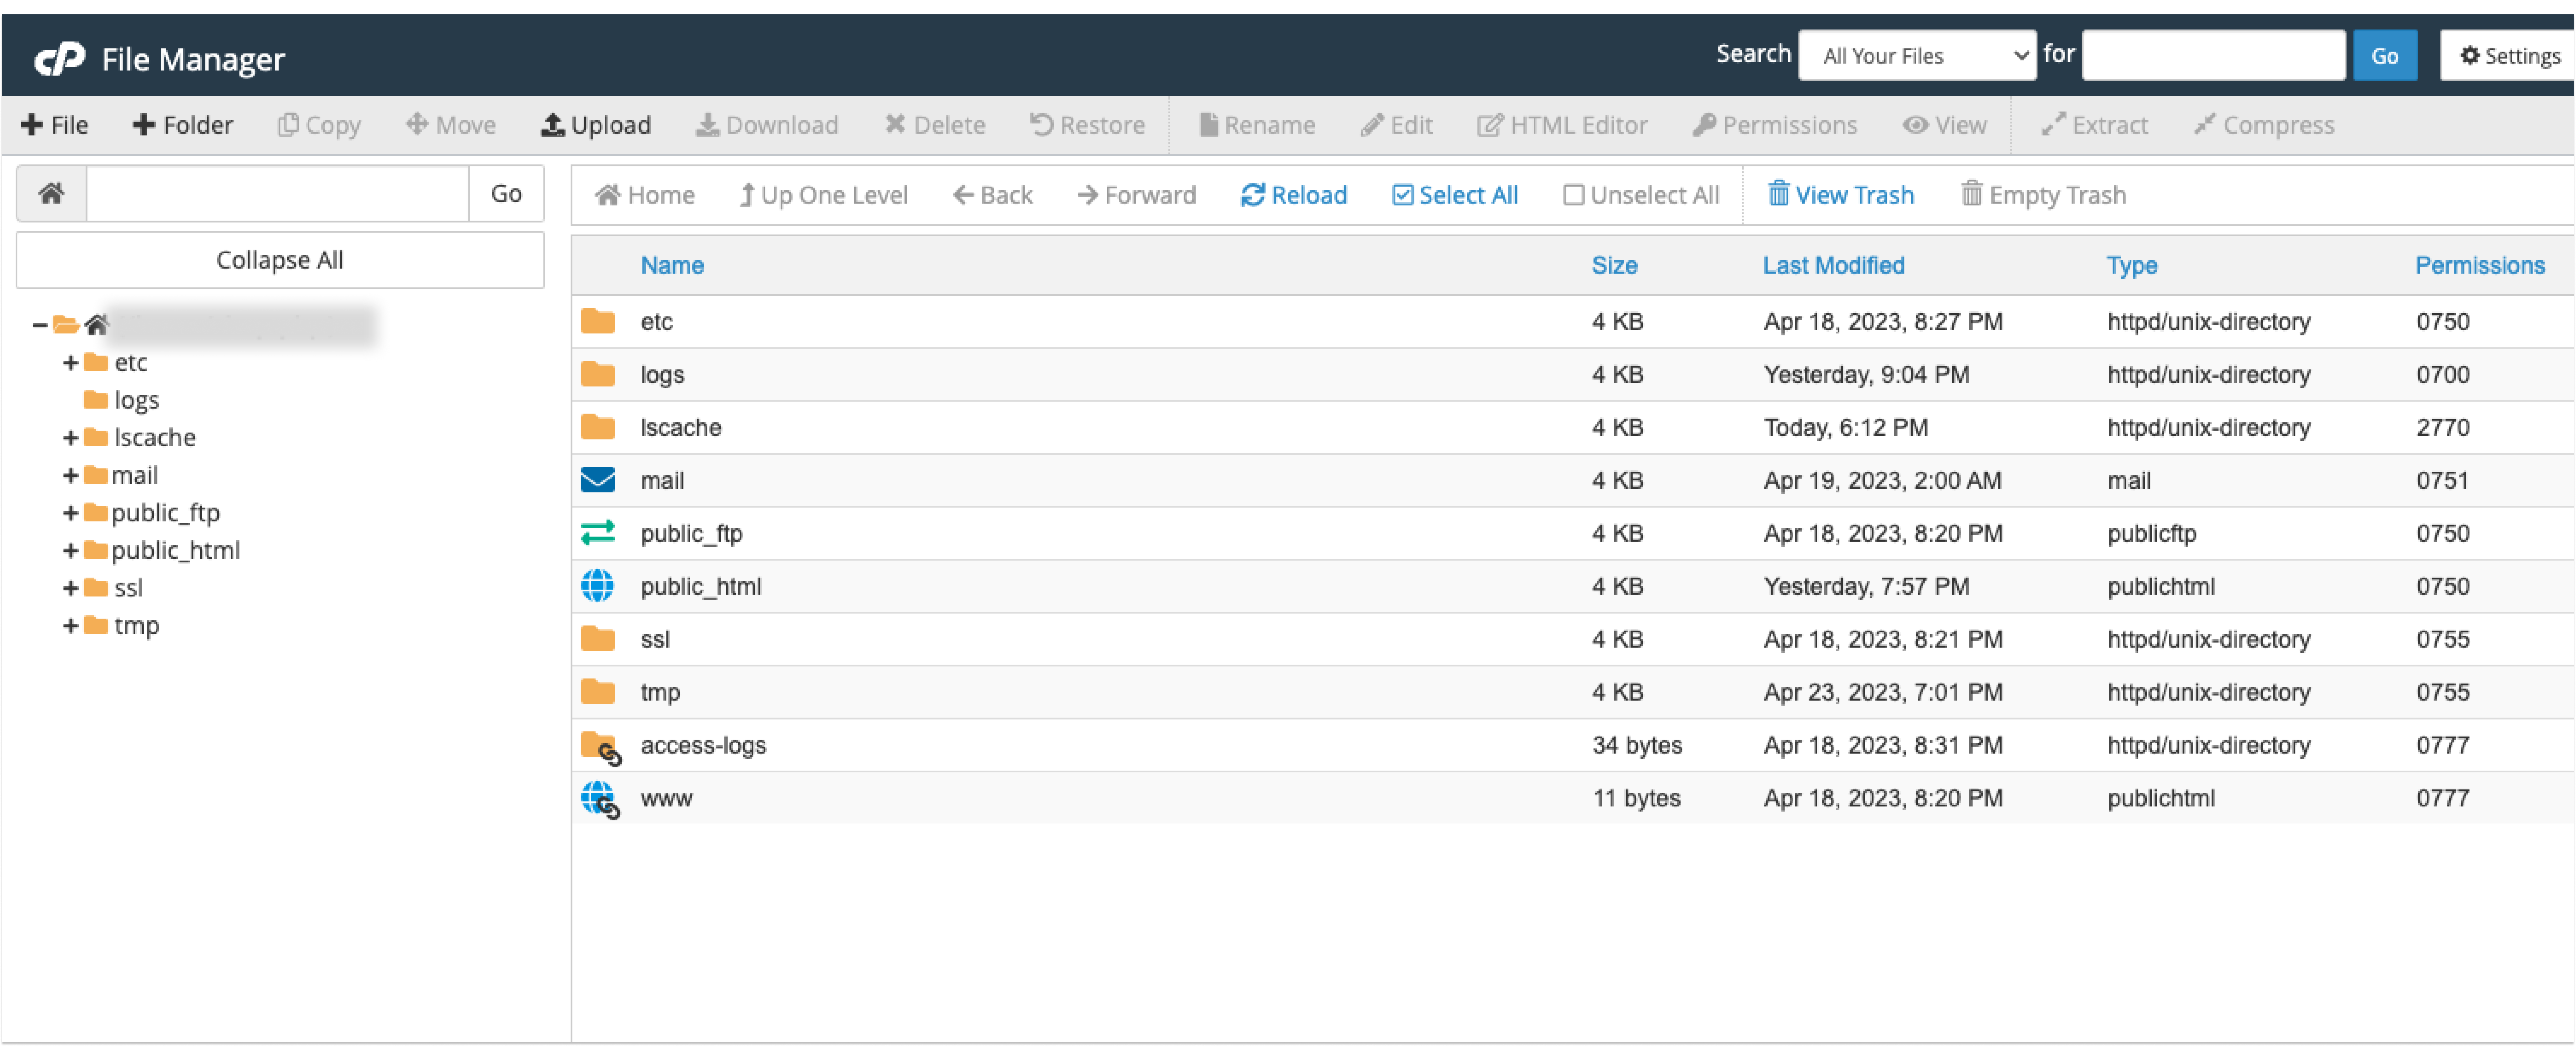
Choose the correct directory: When the File Manager opens, you will see a list of folders and files.
Open the public_html folder: In the File Manager, you will see a list of folders and files. Locate and click on the "public_html" folder or the document root folder associated with your domain. This will open the directory where your website's files are stored.
Start the upload process: Look for the "Upload" button in the File Manager toolbar and click on it. This will open a file selection dialog box.
Select the unzipped WordPress folder: In the file selection dialog box, navigate to the location where you extracted the WordPress folder on your computer. Select the entire unzipped WordPress folder.
Initiate the upload: After selecting the WordPress folder, click on the "Upload" button in the file selection dialog box. The File Manager will start uploading the WordPress folder to the public_html directory on your Namecheap server.
After uploading your folder, click on the "Extract" option to unzip it. This action will create a new folder named 'WordPress' within the 'public_html' folder, where all the files will be saved
Please ensure that you move all files from the 'WordPress folder directly to the 'public_html' folder. The files should not be placed within any additional subfolders.
To accomplish this, follow these steps:
- Navigate to the 'WordPress' folder.
- Select all files within the 'WordPress' folder
- Move the selected files to the 'public_html' folder
- Once you have moved all the files, delete the now empty 'WordPress' folder.
Congratulations! Now you have all files from the WordPress folder in the public_html directory on your Namecheap server. In the following steps, we will proceed with setting up the WordPress database and configuring the installation settings.
Now, go back to the cPanel dashboard and look for the “Database” section. Click on MySQL Database. Check the picture below.

Create a new database: Within the Database section, find the option to create a new database. Enter a unique name for your database and then click the “Create Database” button to proceed. Check the picture below.
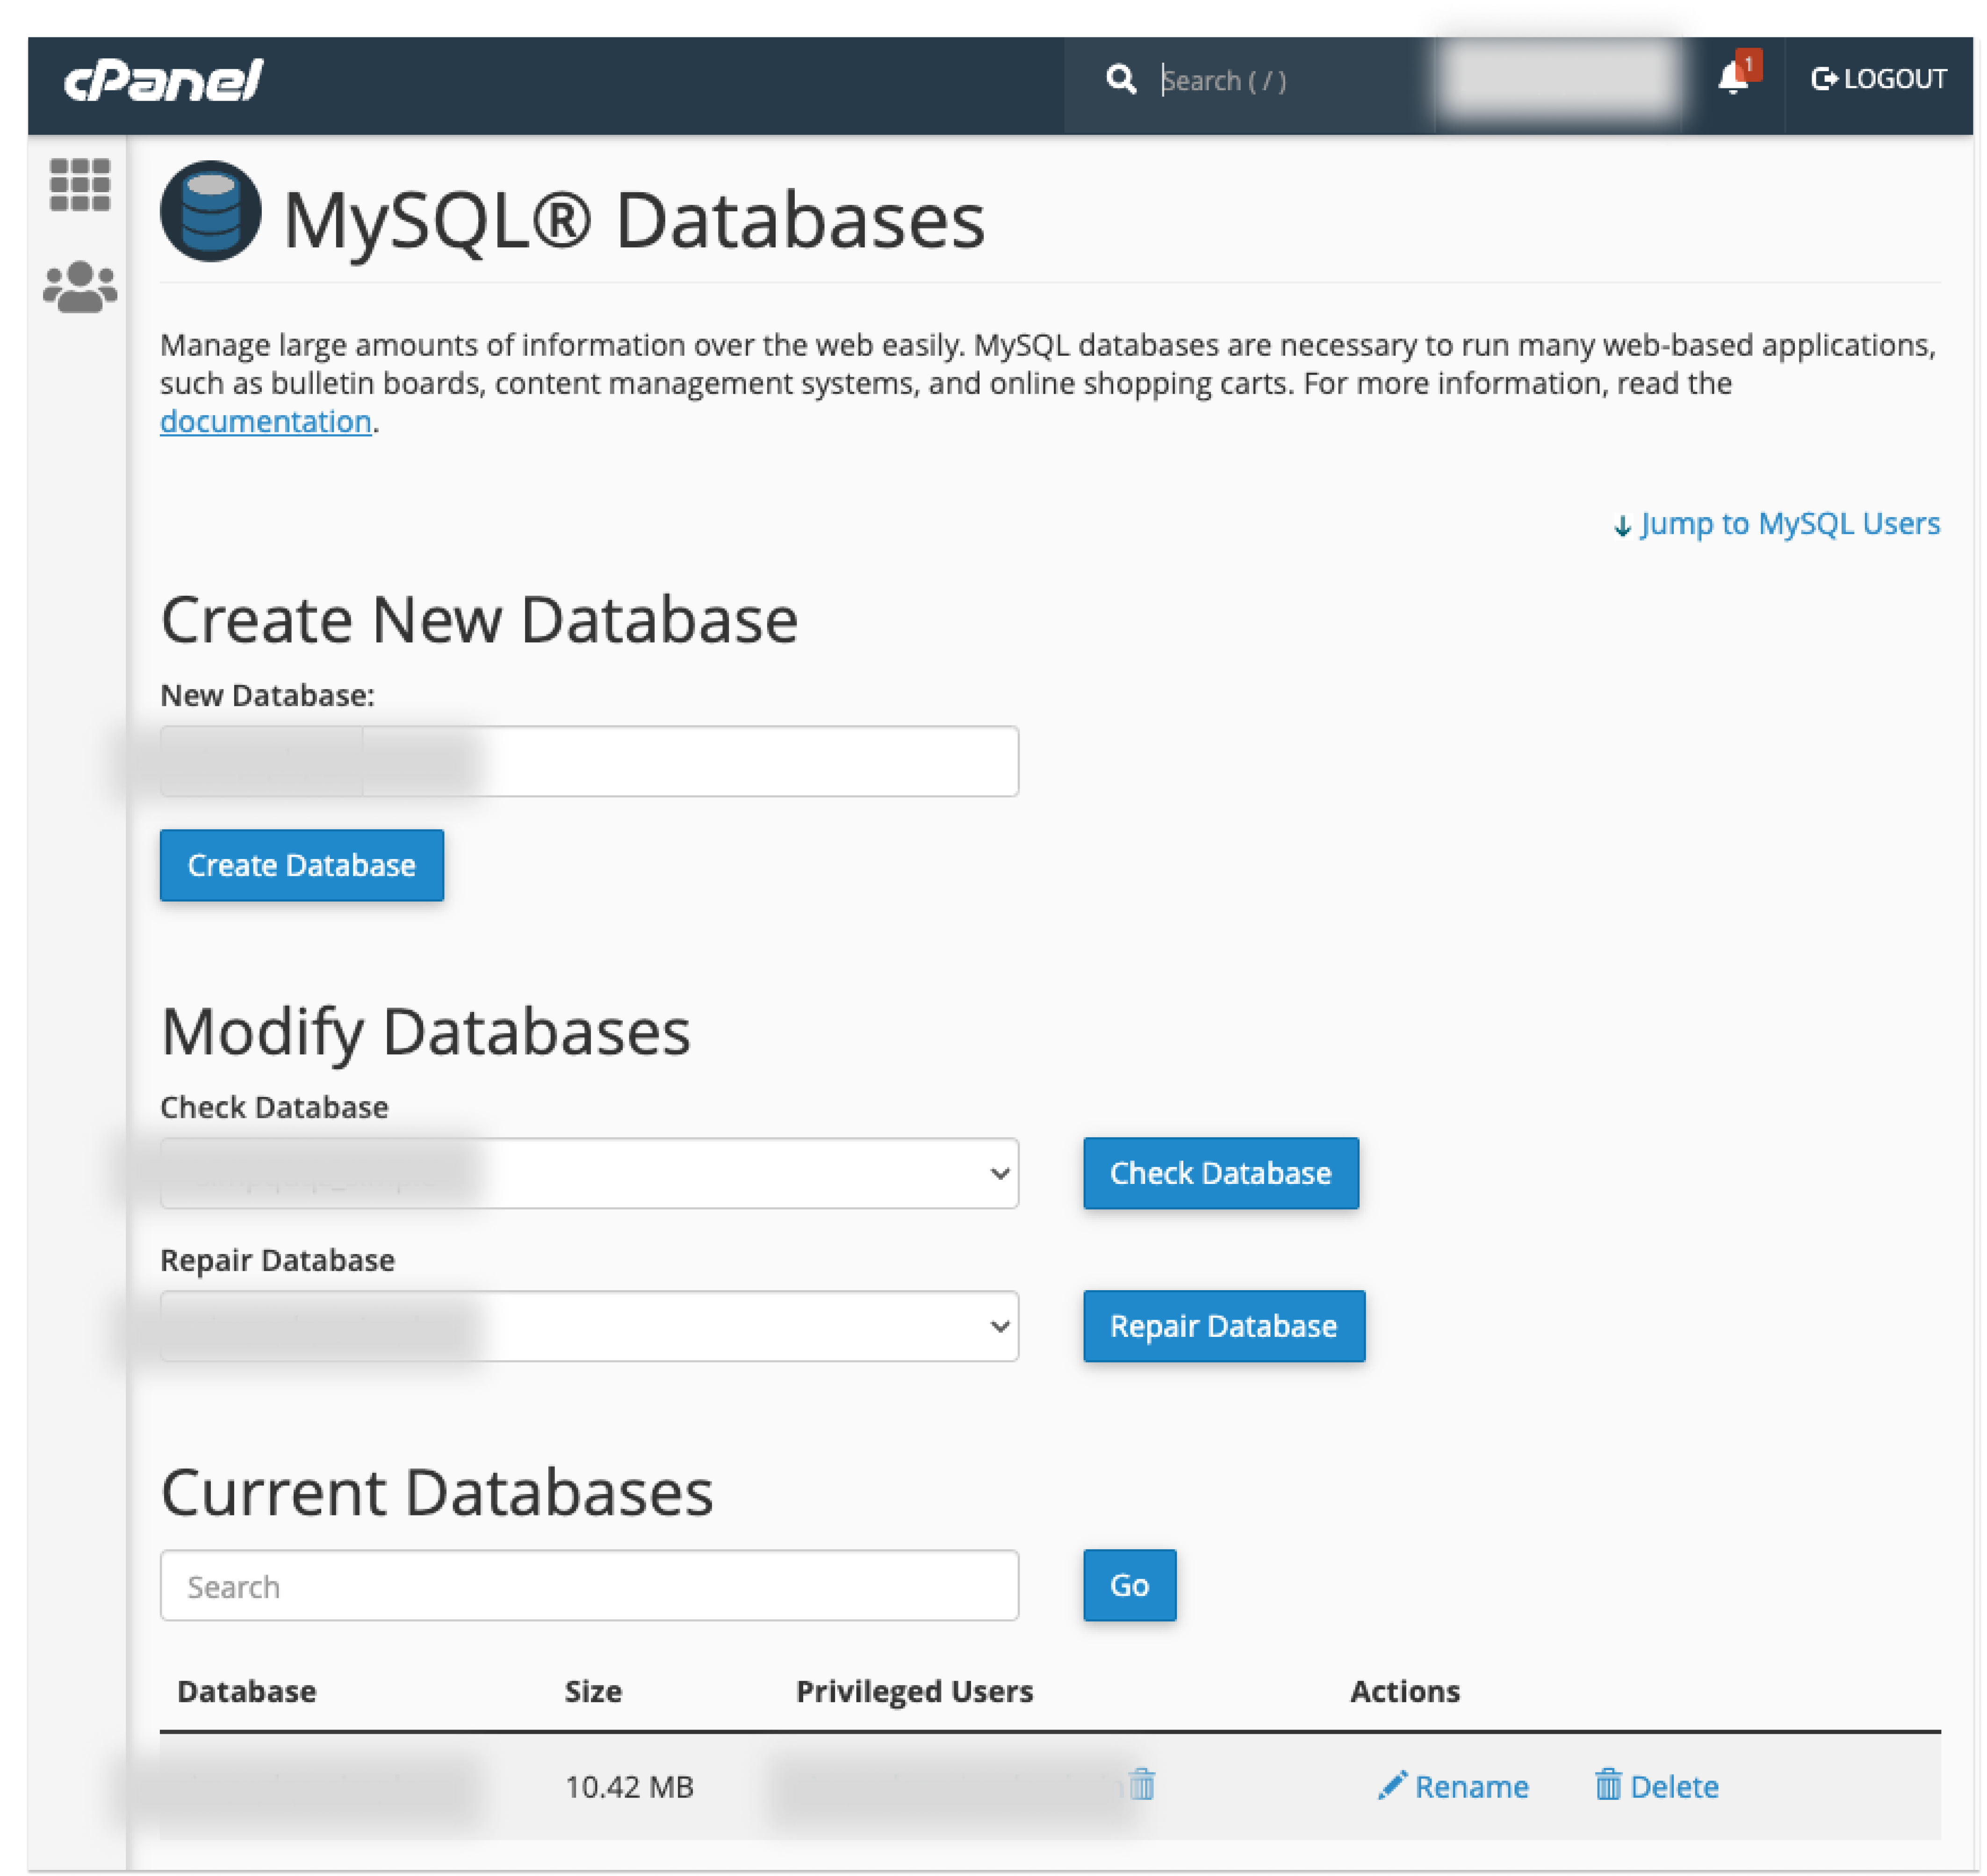
Create a database user: Once the database is created, locate the option to add a new database user. Provide a username and password and click the “ Create user” button to proceed.
After you have created both: the database and the user. You need to Add a user to the Database as well. Find the option at the bottom of the screen. After you click add you will get another screen to set user privileges. Now, on the “Manage User Privileges” screen, click the checkbox for "All Privileges" to grant the user necessary access. And the final step is to Click "Make Changes" to finalize the process.
That's it! You have successfully added the user to the database with all privileges. You can now proceed with the WordPress installation and configuration.
In the Google search bar, type "name of your website/wp-admin" (replace "name of your website" with the actual domain or URL of your website). The screen that you should see is this.
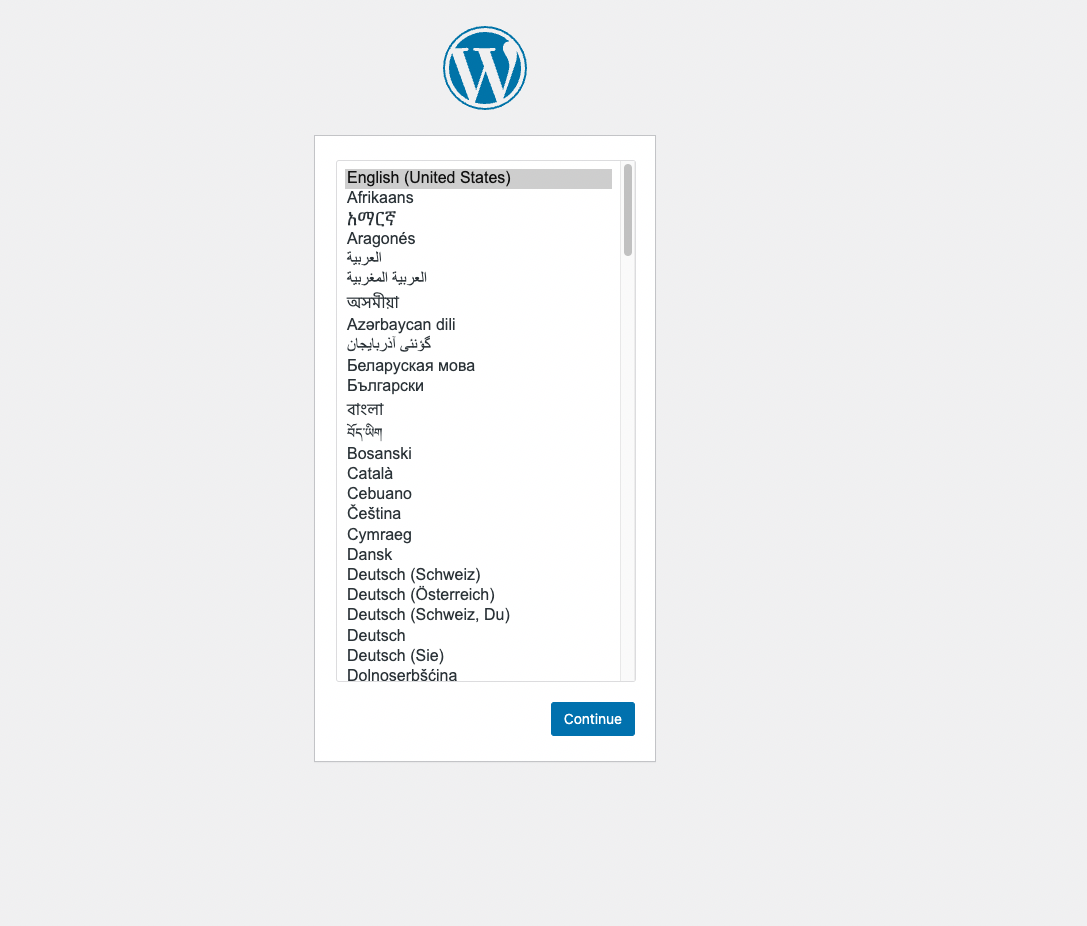
Choose your preferred language and click "Continue".After clicking "Continue", you will be directed to the next screen. Provide the required information, including database details, such as database name, username, password, and host. Ensure you have these details ready. Once you have provided the necessary information, click the "Let's go" button. Refer to the image for guidance.
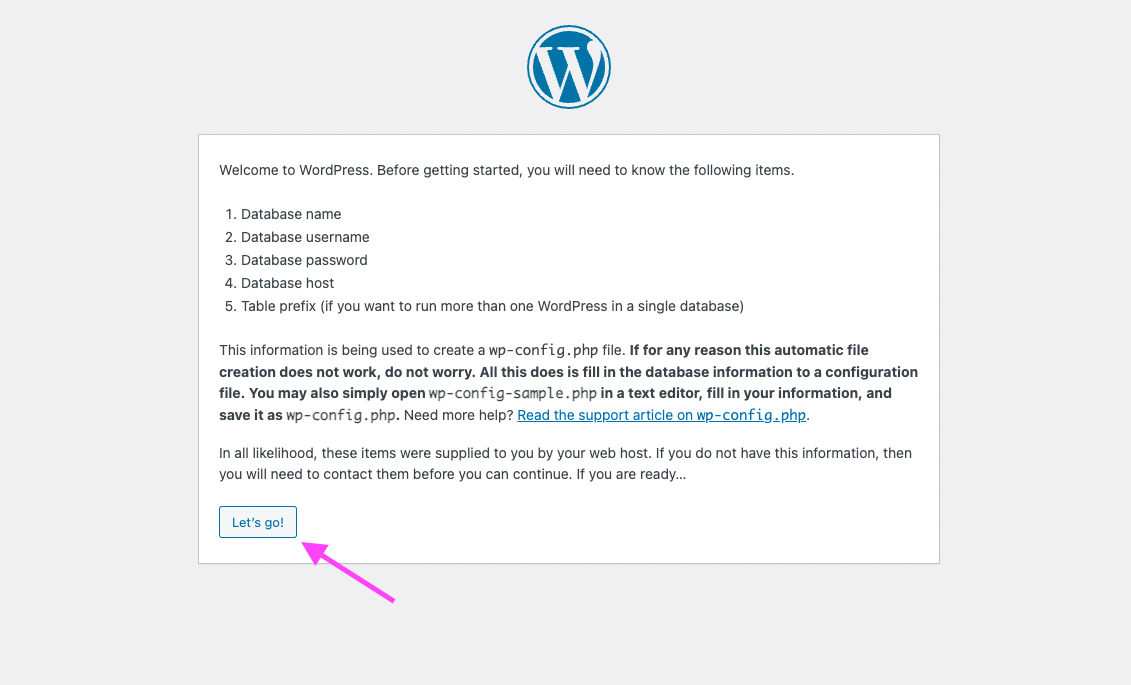
After clicking the "Let's Go" button, the next window will appear. In this window, enter your database connection details, including the database name, username, and password. Once you have entered the database connection details, click the "Submit" button to proceed. Refer to the image for guidance.
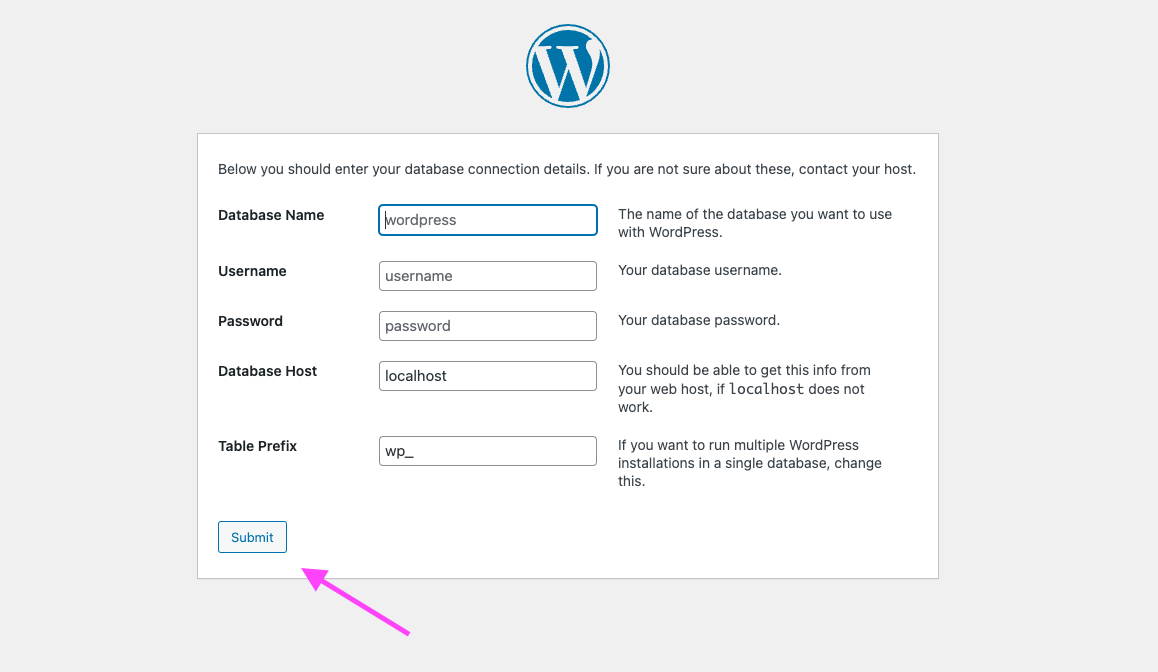
After clicking the "Submit" button, the next window will appear. Click the "Run the installation" button to initiate the WordPress installation process. Refer to the image for guidance.
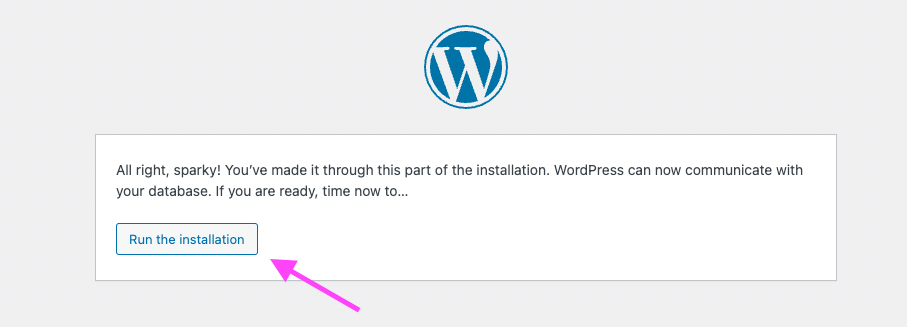
Once you have clicked the "Run the installation" button, you will be redirected to the "Five-Minute WordPress Installation" window. In this window, you will need to fill in the required information, such as your website title, username, password, and email address. After providing the required information, click the "Install WordPress" button to finalize the installation process. Refer to the image for guidance.
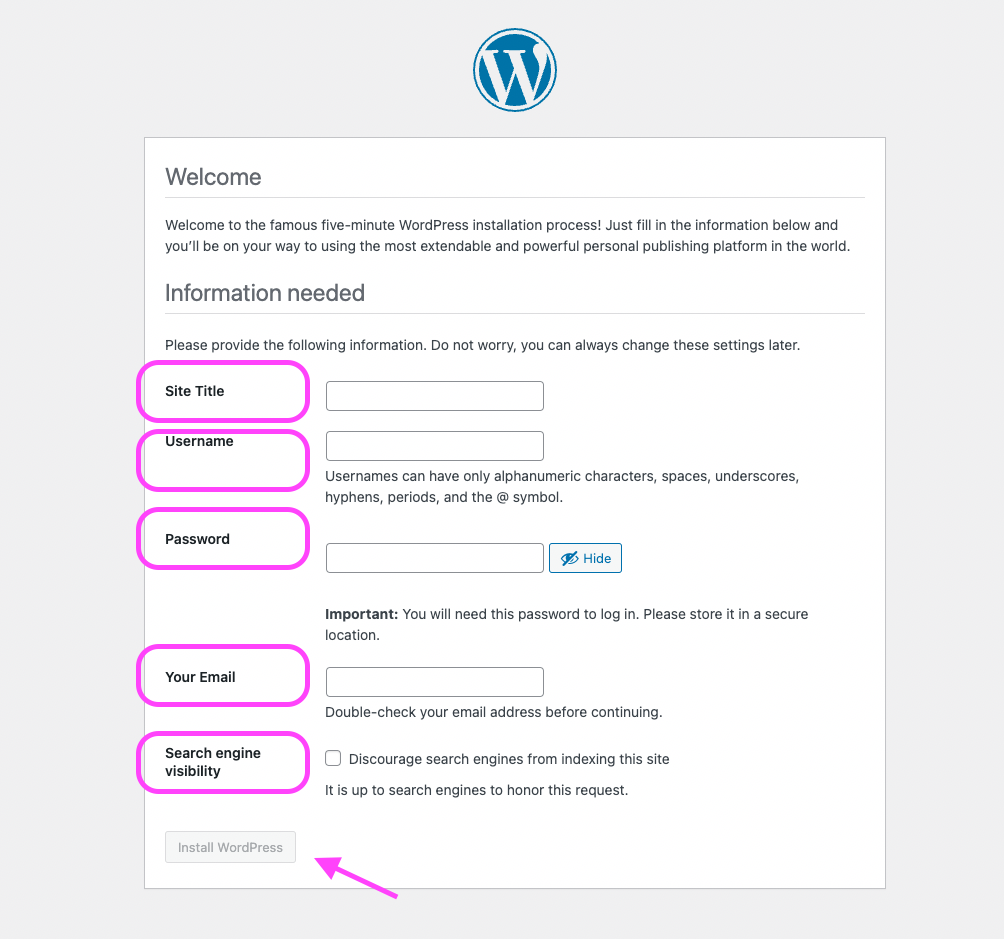
After clicking the "Install WordPress" button, you will be redirected to the screen confirming the successful installation of WordPress. On this screen, locate the "Log In" button and click on it.
You will be directed to the WordPress login page. Enter your Username/Email and password in the provided fields.
Congratulations! You are now ready to start publishing and managing your content on your personal website. Enjoy creating and sharing your ideas with the world!